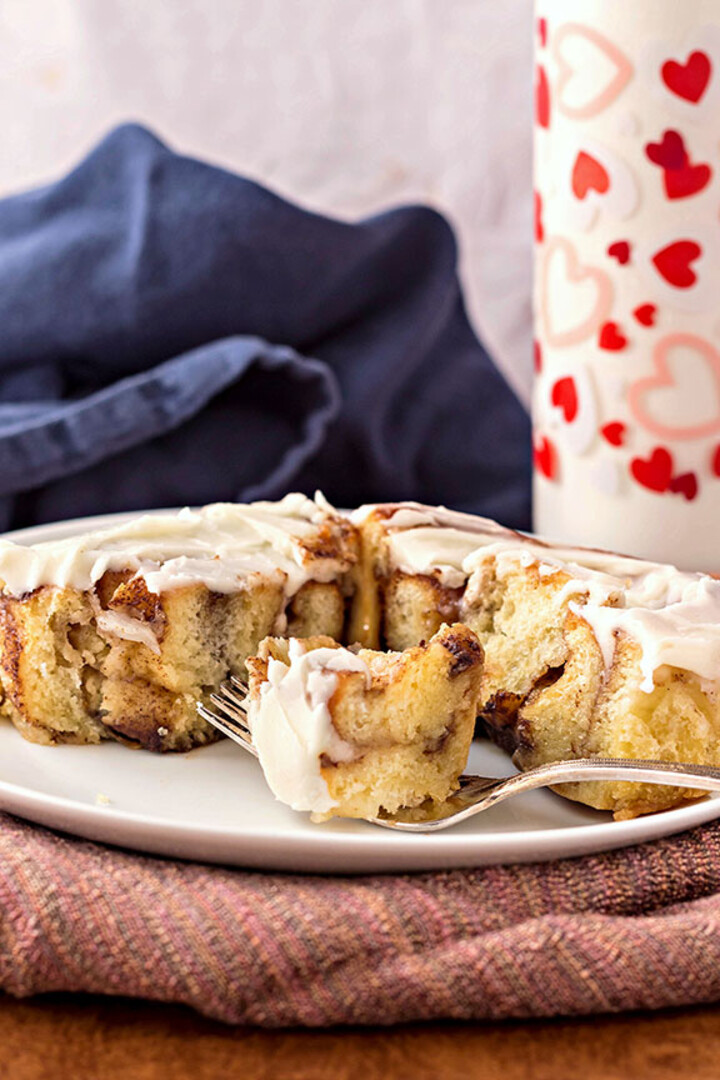
Sweet Dough for Soft, Gooey Cinnamon Rolls with Idaho® Potatoes
This soft, supple sweet dough is made with half a pound of mashed Idaho® Potatoes. It bakes up tender and soft and is perfect for cinnamon rolls, King Cake, yeasted coffee cake and almost any other use for sweet dough you can think of. Once baked, your delicious sweet bread will stay soft for several days at room temperature. For longer storage, wrap well in plastic wrap and then foil or place in a heavy-duty freezer bag, pressing out as much air as you can, and freeze for up to a month.
Read Jenni's full post here.
Ingredients:
Sweet Dough:
- 2 medium Idaho® potatoes, peeled and cut into 1” chunks
- Cold water to cover
- 2 teaspoons kosher salt
- 4 ounces unsalted butter (1 stick)
- 6 ounces whole milk
- 2.3 ounces granulated sugar
- 1 large egg
- 2 large egg yolks
- 2 teaspoons kosher salt
- 1 pound higher protein all-purpose flour (such as King Arthur)
- 1 tablespoon active dry yeast
Filling:
- 2 sticks unsalted butter, softened*
- heavy pinch kosher salt
- 7 oz brown sugar, 1 cup packed
- 2 1/2 tablespoons ground cinnamon
- 1/2 teaspoon vanilla paste or extract
Glaze:
- 4 tablespoons unsalted butter, ½ stick
- pinch kosher salt
- 3 cups powdered sugar
- 3 tablespoons half and half or whole milk
- 1/2 teaspoon vanilla paste or extract
Instructions:
Sweet Dough:
- Place the potatoes in a medium saucepan, and cover with water by about 1". Add 2 teaspoons kosher salt to the water.
- Bring potatoes to a boil and then simmer for 10-12 minutes or until they offer no resistance when pierced with a knife.
- Drain the water out of the pan. Put the lid on the pan and put the pan back on the burner (now turned off) for about 5 minutes. This will help the potatoes to dry. When ready, they will look a little "floury" on the outsides. If you have a stove whose burners do not retain heat (such as a gas stove), put over a very low flame to dry.
- Weigh out 8 oz of the potatoes (about 1 cup, lightly packed), and put them in the bowl of your stand mixer. Fit the mixer with the paddle attachment and mix until smooth.
- Cut the butter into 4-5 pieces and add to the mixer. Mix until the butter has melted.
- Mix in milk, sugar, egg, egg yolks, and salt until you have what looks like potato soup.
- Add the flour to the bowl, and top with the salt. Switch to the dough hook, and mix on low speed until the dough comes together, about 2-3 minutes.
- Increase speed to medium and knead dough until soft, shiny, and elastic. This will take about 10-15 minutes.
- Once the dough is shiny and stretchy, gather it into a ball. The dough will be very soft, so do the best you can.
- Place the dough in a large, buttered or pan-sprayed bowl. Spray the dough ball with more pan spray, and cover with plastic wrap. Refrigerate dough overnight or up to 2 days.
Filling:
- Mix together all the filling ingredients. I find using a clean hand to squish everything up works best for me. If you prefer, you can also do this with a hand mixer.
Glaze:
- Melt the butter and salt together in a medium, microwave-safe bowl.
- Whisk in the powdered sugar as thoroughly as you can.
- Add the half and half or milk and vanilla and whisk until smooth. The glaze should be spreadable and not runny.
To Shape and Bake:
- Generously flour a large, smooth work surface. Turn chilled dough out onto the floured surface and press out the gases. Flour the top of the dough.
- Using a rolling pin, roll dough into a large rectangle no more than 1/4" thick. Finished rectangle will be about 24" long and 18" tall. Try to keep it as even as you can. Use a dough scraper to help lift the dough if it sticks some. Then you can scoot a bit more flour underneath to keep things loose.
- Using an offset spatula, spread the filling mixture on top of the dough in an even layer. Go from edge to edge, but leave about 1 1/2" bare along the top edge of dough.
- Using your bench knife to help if necessary, roll the dough into a long cylinder. Pinch the seam together as well as you can and roll the cylinder over seam side down.
- Cut off either end of the cylinder so you expose a nice spiral of filling on either end. If your dough rectangle was a bit uneven, you may have to slice off a good 3-4" inches. Worry not. I have a use for those ends, so just set them aside and see the Notes section.**
- Slide a long piece of unflavored dental floss under the dough cylinder until you reach the center. Pull the ends up and cross them over each other, and pull tightly to make a clean slice. Working with half of the cylinder at a time, slice in half again, and then slice each half into 3 even pieces.
- Arrange the dough spirals on your prepared pan/s.*** Leave about an inch of space between each roll. Spray lightly with pan spray, cover with plastic wrap or a lint-free towel, and let rise in a warm place for about 45 minutes to an hour until puffy.
- While the rolls are rising, preheat oven to 375°F and set a rack in the center of the oven.
- When rolls are nice and puffy, place in the oven and bake for 10 minutes. Rotate the pan/s and bake an additional 12-15 minutes or until the rolls are a lovely medium golden brown. The internal temperature of the rolls should be between 195F-205F.
- Remove pans to cooling racks and let cool for 10-15 minutes.
- Generously ice the rolls using an offset spatula. If you'd rather, you can put the glaze in a piping bag fitted with a round tip and pipe the icing on in spirals or in a crosshatch pattern.
- Enjoy warm or at room temperature.
- Store, well covered, at room temperature for up to 3 days. Wrap well and freeze for longer storage.
Notes:
*For a slightly less ooey-gooey filling, you may decrease the butter to 1½ sticks.
**About those dough ends: Using your bench knife, randomly slice up the leftover ends of dough and place them either in lined muffin tin cavities or a small pan lightly sprayed with pan spray. Let these rise and bake the same as you did the rolls. Now you have some "monkey bread," to munch on!
***If you want to bake all your cinnamon rolls in one pan, use a 9"x13" straight-sided cake pan. Otherwise, use whatever round or square pans you have. They will taste amazing either way. Whatever pan/s you use, spray them lightly with pan spray before filling them with the dough.


